Sunday, 26 October 2014

Windows decision

We have finally decided on the windows.  Went with Creative Windows (http://www.creativewindows.com.au/) in Braeside who are fabricating the Schuco (http://www.schueco.com/web/au) frames.  After a number of discussions with other suppliers, and nearly placing the order with Qualital (http://www.qualital.com.au/) we went with a locally made product.  Qualital pricing was very good and the quality of the windows was also very good but they do not provide local installation and since all windows are imported, any glass breakages mean that you either have to wait for replacement glass from Europe or use a locally sourced product which inevitably will have a different appearance.

Initially, Creative offered a double glazed window with Low E glass but were only able to achieve a U-value of 1.61 and a SHGC of 0.59 (Qualital were offering U-value of 1.2 and a SHGC of 0.59). In addition, the Shuco frames (not their passive house version) performed worse than the Qualital composite frames.

Working with Creative to find alternatives they offered a locally double glazed product with a U-value of 1.34 which was approaching the Qualital numbers but the SHGC was only 0.27 which meant that was not enough solar gain and had a significant impact on the Space Heating Demand when modelled in PHPP (Passive House Planning Package) with numbers exceeding 30kWh/m2a.

Clearly, this was not acceptable, so I asked Creative to explore the cost impact of going to triple glazed, we had quotes from other suppliers and they indicated that the jump to triple glazed would only add 5% to the cost, but they were European windows so I was keen to see how Australian made units compare.  The first pass saw an increase of >8% but the suppliers of the glazing and Creative began to tweak the specification and ended up with a 5mm/8 argon/4mm Energytech / 8 argon / 5mm Energytech glass option with a U-value of 1.0 but still retaining a SHGC of 0.59.

To further keep the costs down but keep as much performance as possible, we downgraded a number of very small windows (eg.450x450mm) where the frames had a significant impact on the overall window U-value back to double glazed.  This left all of the North facing windows (90% of the total glazed area) as triple glazed.  It saved a few thousand dollars and had little impact on the SHD.

The new Space Heating Demand is 15.99kWh/m2a and a Heating Load of 9.9 W/m2 - so border line within the PH requirements but the model is not complete - so watch this space...

Other window suppliers worth consideration;


Tuesday, 21 October 2014

Week 3 - Finishing retaining walls and slab setout

By Tuesday afternoon on week3 the final retaining wall is complete..


Next job is to set out the slab ready for the concretor to work on the piers next week.  As with the retaining wall there are a lot of piers.

The setting out is pretty much complete, just got to double check measurements..


Having a few issues with the contractor for the slab and ICF walls, basically contract details, but all should be sorted Monday or Tuesday at the latest.  If they start on Wednesday we should only be a few days behind schedule and this can be caught up later - still hoping to get the roof framing done by Xmas, with the roof to go on in Mid Jan.

Week 2 - Site Cut and More Retaining Walls

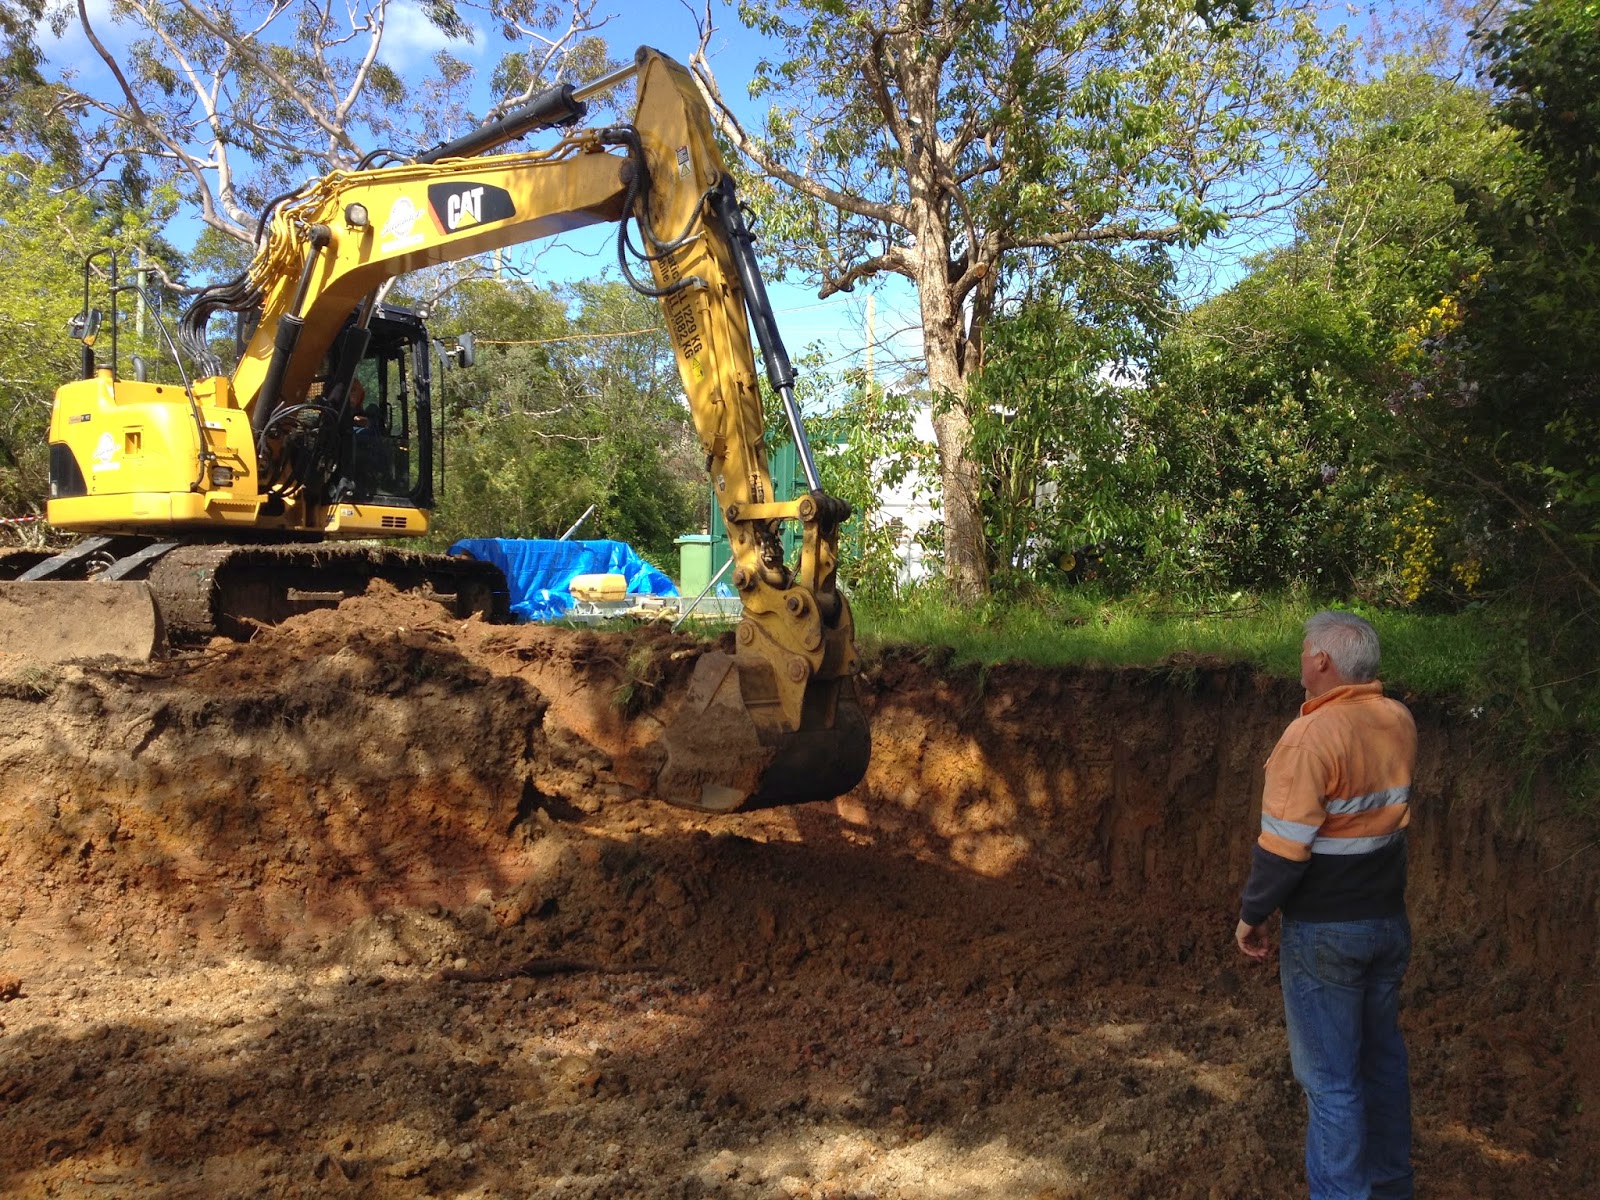
Week 2 started the Friday before with a 14 ton excavator being dropped off to site.  Monday morning 7am, the digging began.


The first of 19 trucks to take dirt away.  300m3, of course we only allowed for 150m3 - the first variation.


The hole got bigger and bigger..


Pretty well done by Tuesday afternoon.


On Wednesday work begins on the next retaining wall.
This time its 49m long but only normal foundations i.e. same depth as height


Thursday, 16 October 2014

Week 1 - Retaining Wall

The first week kicked off with confirmation from the building surveyor that we were good to start the project despite not yet formally receiving the Flood Prone - Report and Consent from the council.

The retaining wall on the north side of the house is to allow a level area in front of the house. It is 28.5m long and due to the landslip issues the wall is engineered with 3 meter foundations with posts at 1500 centres.  


The holes are deep!


The posts weighed over 80 kg each, the contractor decided to position them without a machine


At the end of day 2, half of the posts were in..


The local wildlife gave the posts their stamp(?) of approval.


It was decided to use wheelbarrows rather than a concrete pump to save money.


The end of day 3 only 3 posts to go..


Almost done..


Sunday, 5 October 2014

Site Layout and Floor Plan

Here is the site plan.  The double storey brick house was demolished in 2010 to make way for the previous design/build concept.


The floor plan and layout of the new design


Welcome

Welcome to my blog about our Passive House build

We are building a Passive House (or one which is very close!!) This blog is a way of documenting the process of the build for anybody interested in Passive House and how a real project progresses.

The house is being built in Mt. Eliza (Melbourne) Australia and while Passive Houses have been commonplace in Europe for many years, in Australia the concept is just taking off.

I will do my best to keep this regularly updated...

Peter Hook


Project History

Here is a little bit of history about the project.

We purchased the land with an old house in 1997, while living overseas.  It was rented out until we returned to Australia in 2008.  While the old house was barely livable it was always the plan to demolish and rebuild on the site.

When we purchased the site, we were aware of issues of landslip in the area.  This later led to many complications in a  number of the development options we were exploring.

Initially, the approach was to talk to design build companies but most fell short in delivering on our expectations in terms of energy efficiency and were never 100% happy with the layout/design.  One builder met our expectations better than most but ended up doubling the contract price from initial indications and subsequently the project stalled, after consuming a considerable deposit and  demolishing the old house, completing working drawings / obtaining planning permission etc.

The project was stalled for 3 years and we then decided kick it off again, but this time we would do it differently.  Get a designer to design the house in an energy efficient manner and meeting all of our requirements.  We appointed a designer, who we believed was aligned to our own views, particularly energy efficiency.  Unfortunately, the design was still lacking in a number of areas and out of desperation took on the design personally.

Once we had a design that met the requirements of the site and how we intended to use the building, we appointed a Quantity Surveyor to estimate the build cost.  This was the best decision we ever made.  The QS came back with a number to build a Standard Australian Brick Veneer house using a local build.  The amount was above our budget and we were still sure that we didn't want a Standard Brick Veneer house and that our requirements would surely push the costs up. So, in February 2014, the decision was made to Owner Build.

By Owner Building, we could be in control of budgets and compromises that would inevitably need to be made during the process.  The first step was to decide on the building construction.  I knew that the house needed to be well insulated and my experience with polyurethane sandwich panels overseas led me to a number of international suppliers of high performance materials.

One of the conversations with the insulation manufacturer informed me of a house being built in my street, about 10 doors away, that was embarking on a "Passive House" design.  A little more research led me to the concepts of Passiv Haus, a process of design and construction where a completed house will be extremely comfortable to live, and one which uses very little energy to heat and cool throughout the year.

The Passive House principles were very much aligned to my own design approach and by tweaking the design in a few areas our new house could be realised as a Passive House, or at the very least one approaching the requirements of a certified passive house.